

Upgrading your internet plan is exciting, but the setup process is often stressful and time-consuming. Whether you’ve joined with an NBN modem or a BYO modem system, the setup process is similar for both.
If you’ve just joined iiNet and you’re looking for help setting up your high-speed NBN modem router and getting it ready to connect devices around the house, we’ve got your back. This guide covers the basics for getting up and running with your latest plan so you can enjoy the benefits of a new broadband plan.
iiNet’s Best Features
iiNet Connection Types: What are You Setting Up?
iiNet offers heaps of different internet services, so you must know exactly what you’re setting up. Here’s a quick breakdown of the various connection types available from iiNet.
ADSL Broadband
Asymmetric Digital Subscriber Line (ADSL) broadband is a basic connection type available throughout most of Australia. It’s outdated today, with NBN broadband plans offering faster speeds. However, the NBN plan has yet to roll out nationwide, and ADSL is the best alternative for those in remote rural areas.
VDSL2 Broadband
Very High-Speed Digital Subscriber Line 2 (VDSL2) broadband is the next step above ADSL broadband. VDLS2 has a greater reach than many connection types, making it ideal for remote homes. It offers higher speeds and is equally widely available around the country, like ADSL lines. However, it is still behind the capabilities of NBN connections.
Naked Broadband
Naked broadband is a broadband plan without phone service. Traditionally, it was only possible to find WiFi plans with a landline telephone service. As mobile phones have become omnipresent, however, the need for landlines has dropped.
NBN Plans
There are numerous National Broadband Network (NBN) plans, including Fibre to the Node (FTTN), Fibre to the Cabinet (FTTC), Fibre to the Premises (FTTP), and Hybrid Fibre-Coaxial (HFC). NBN plans achieve the fastest speeds for the highest prices nationwide, check out some of the latest plans below.
NBN Broadband Plans
![]() $20/mth off for 12 months
$20/mth off for 12 months![]() Offer ends 24 Feb 2026
Offer ends 24 Feb 2026- NBN50 Unlimited - Month to Month
- No Lock-in Contract
- Unlimited Data
- NBN 50™ Fixed Line
- Manage your account online with My Dodo
- Stream 4K video
- $65.99/mth
Min Cost - $65.99 for the first month ($0 with BYO modem)
Setting Up Your iiNet Modem
When you know which NBN modem you have (if you have an NBN plan), it’s time to review the steps for setting it up effectively. Let’s go over the process now.
Ensure You Have Contact
iiNet will contact you via SMS or email to let you know that your service is active, and you can start the setup process at home. Don’t start setting up until you’ve received a message from iiNet, or your modem won’t work, and you might face other setbacks too.
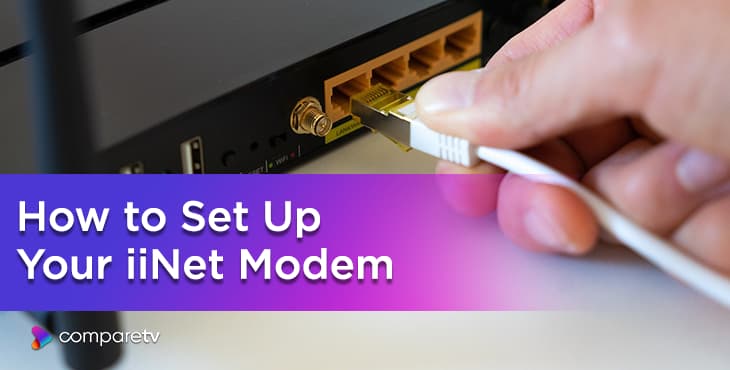
Plug in Your Modem and Learn About its Lights
The NBN tariffs from iiNet typically include either the Smart Modem Gateway VX420 G2H or the VX220 G2V Modem. Both modems look the same, so understanding the lights they display is simple enough. From left to right, the lights on the front of your modem are Power, DSL, 4G, Internet, 2.4GHz, 5GHz, WAN, LAN1, LAN2, LAN3, LAN4, Phone, WPS, and USB.
Most of the time, setup for both the Smart Modem Gateway VX420 G2H and the VX220 G2V Modem is straightforward. Plug your NBN modem into a power outlet and see the ‘power’ light turn green. There are different plug-in processes depending on your connection type, but each box is provided with ethernet cables for your various needs.
- ADSL, VDSL2, NBN for FTTN/FTTB, and Naked Broadband: Plug the provided phone cable into the grey DSL port and the phone socket on the wall/ADSL port on the line filter.
- NBN FTTC: Plug into the blue WAN port on the modem via ethernet cable, connecting it to the yellow Gateway port on the NBN Connection Device.
- NBN HFC/Wireless/Satellite and NBN FTTP: Connect to the blue WAN port on the modem via ethernet cable to the UNI-D1 port on your NBN Connection Box.
- Non-NBN FTTH: Plug the ethernet cable into the blue WAN port and the LAN1 port for the FTTH Connection Box.
Wait for 15 minutes, and your WiFi network should configure itself and get you online. If the automatic configuration has worked, your modem’s internet light on its front should be green. If the planet-shaped modem router light is any colour other than green, it’s time to go manual.
| Contact Method | How to Access | Hours |
|---|---|---|
| Support Phone Line | 13 22 58 | 24/7 |
| Online Chat Support | iiNet’s website | 24/7 |
What Should I Do If My WiFi Stops Working?
If your WiFi signal drops and you lose your online connection, try turning the modem off for 30 seconds. Sometimes, switching the modem off lets it clear its storage cache and implement any updates it has. After 30 seconds, switch it back on again and give it a few minutes to re-establish a signal.
After this, you should be able to connect devices again without issues. It’s common to have to restart your router like this every few months to ensure you’re getting to the optimum speeds you pay for on your broadband plan. If you’re still not getting the desired connection, run an internet speed test and contact iiNet.
How to Use Manual Configuration for iiNet Modems
The different modems from iiNet have individual requirements for manual configurations, such as phone or ethernet cables. To find the specific needs of your modem router, visit the link http://10.1.1.1 and use the GUI Login on the modem’s barcode sticker. The site provides a Setup Wizard for different modems and connection types, including the NBN Connection Box commonly needed to get online.
Manually setting up your NBN Connection Box is more difficult than the automatic configuration process. Thankfully, iiNet support makes connecting devices and getting your WiFi set up significantly easier.
Both the Smart Modem Gateway VX420 G2H and the VX220 G2V modem models can provide excellent broadband speeds, making them solid choices for many users. Visit our broadband reviews page to discover more about which providers are right for you.
iiNet Modem Setup FAQs
Here are some common questions about setting up your iiNet modem:
To access your modem settings, use a connected device to visit the link http://192.168.1.1. Log in with either a predetermined custom password or the generic password: ‘admin’. From there, you can access the settings for your modem and customise it for your home.
Generally, your Smart Modem Gateway should only take roughly 15 minutes to configure itself automatically. Once you’ve received confirmation that your service is live, you can plug it in, connect it, and leave it for a while to get to work on its own. If that fails, you’ll have to connect it manually using the steps above.


